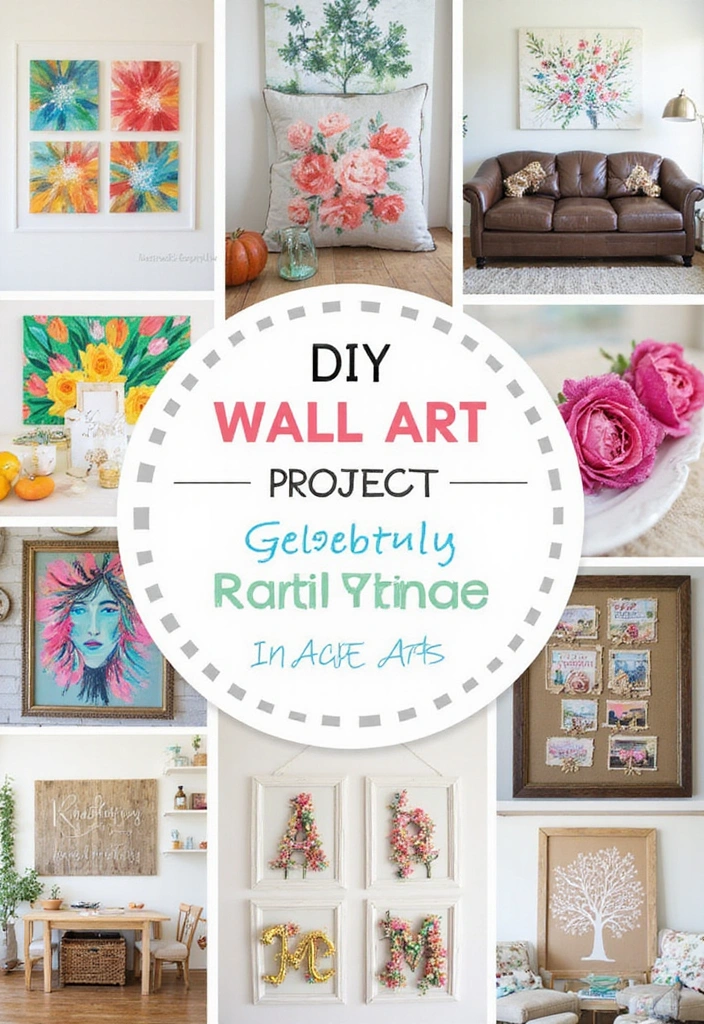
Transform your living space into a canvas of creativity with these 22 easy DIY wall art tutorials!
Whether you’re an experienced crafter or just starting out, these step-by-step guides will inspire you to create stunning pieces that reflect your personal style.
From paint splatters to textured materials, each project is designed to be approachable and fun, turning your walls into a gallery of your own making.
Contents
- 1. Abstract Paint Pour Art
- 2. Framed Fabric Art
- 3. Geometric Wall Art with Tape
- 4. DIY Botanical Prints
- 5. Cork Board Art
- 6. String Art Wall Hangings
- 7. Watercolor Wall Art
- 8. Photo Collage Wall Art
- 9. Canvas Quote Art
- 10. Upcycled Wooden Pallet Art
- 11. Mosaic Tile Art
- 12. Painted Rock Art
- 13. Shadow Box Art
- 14. Hand-Painted Plant Pots
- 15. Clay Wall Art
- 16. Digital Print Art
- 17. Yarn Wall Hangings
- 18. Canvas Splatter Art
- 19. Dried Flower Art
- 20. Fabric Wall Hangings
- 21. Personalized Name Art
1. Abstract Paint Pour Art
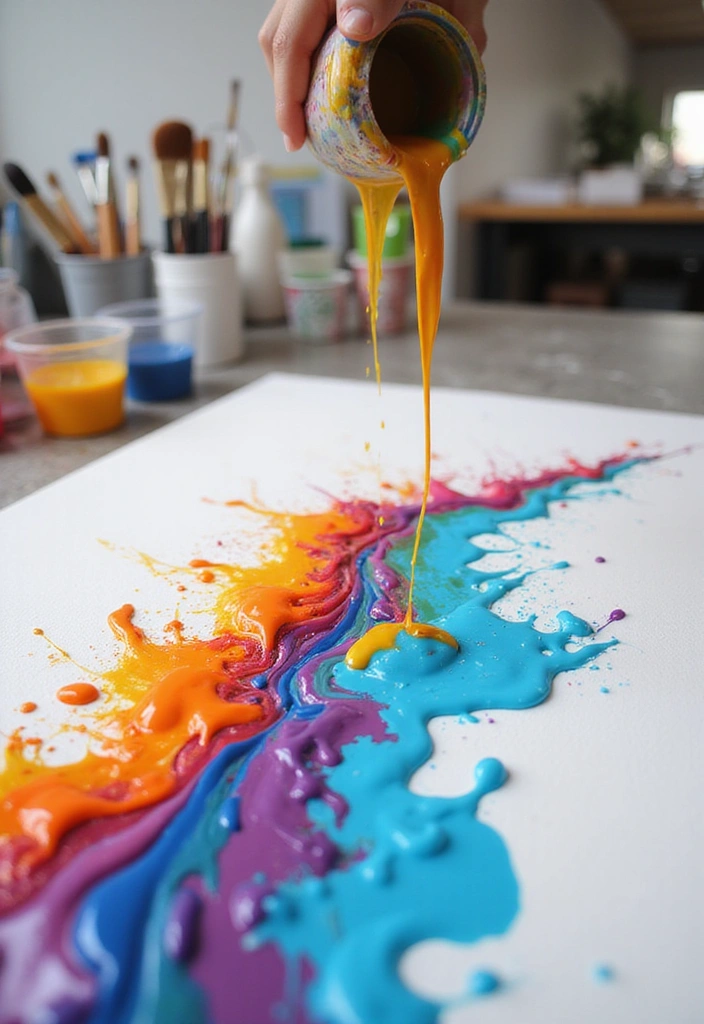
Immerse yourself in the captivating realm of abstract art with the exciting paint pour technique.
With a vibrant array of acrylic paints, you can create swirling patterns that reflect your unique artistic vision. This method is simple and requires only a few essential materials: a canvas, a selection of acrylic paint set, a pouring medium, and some plastic cups for mixing your colors.
Don’t forget to protect your hands with a pair of gloves as you dive into this creative experience.
In just a few hours, you can let your imagination run wild, experimenting with different shades and techniques, all while watching your blank canvas evolve into a stunning work of art.
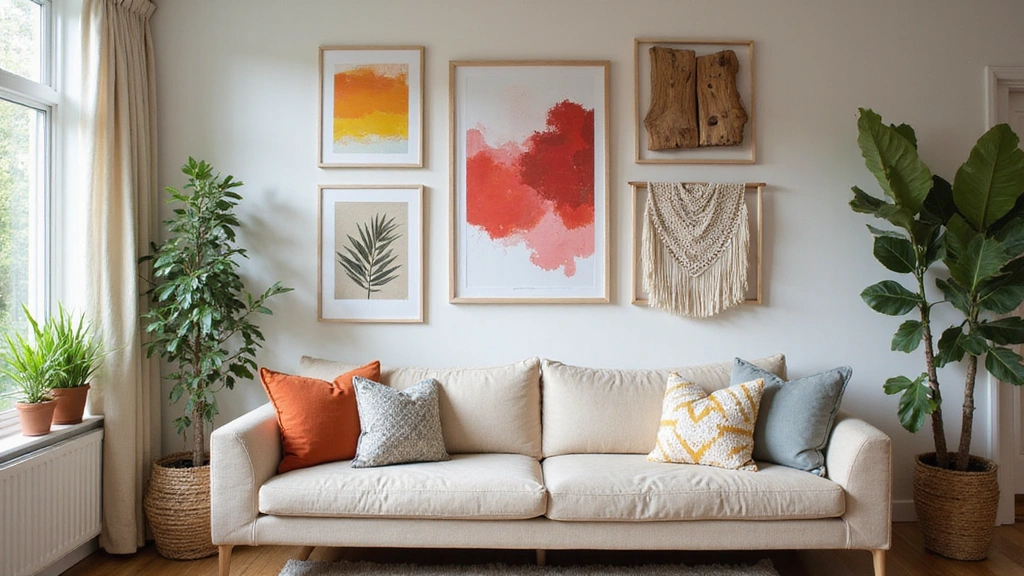
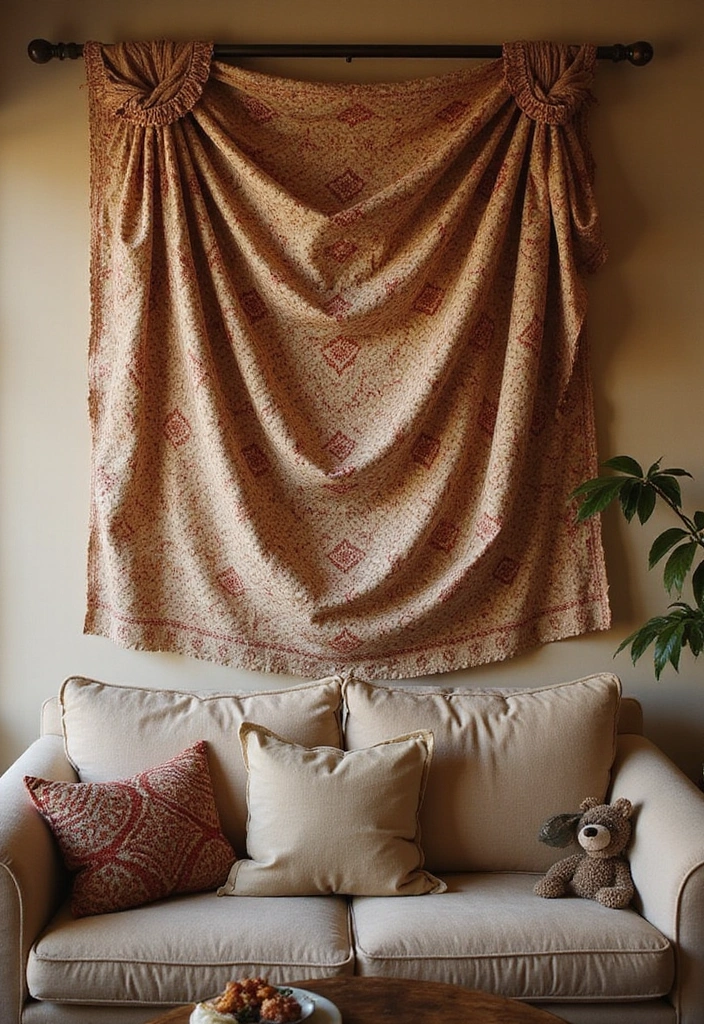
2. Framed Fabric Art
Elevate your home decor with the charm of framed fabric art, which adds both texture and warmth to your walls.
Select fabrics that reflect your personal style—whether you prefer vibrant floral patterns, striking geometric designs, or calming soft neutrals. To get started, explore a variety of fabric swatches that can inspire your creative choices. Once you’ve picked your favorites, frame them in simple wooden or metal frames for a polished look.
This DIY project is not only straightforward but also gives you the flexibility to change out fabrics with the seasons, keeping your decor fresh and inviting.
Don’t forget to grab some scissors for precise cutting, and ensure your art is securely hung with hanging hardware.
By arranging a collection of framed pieces together, you can create a stunning gallery wall that beautifully tells your unique story.
3. Geometric Wall Art with Tape
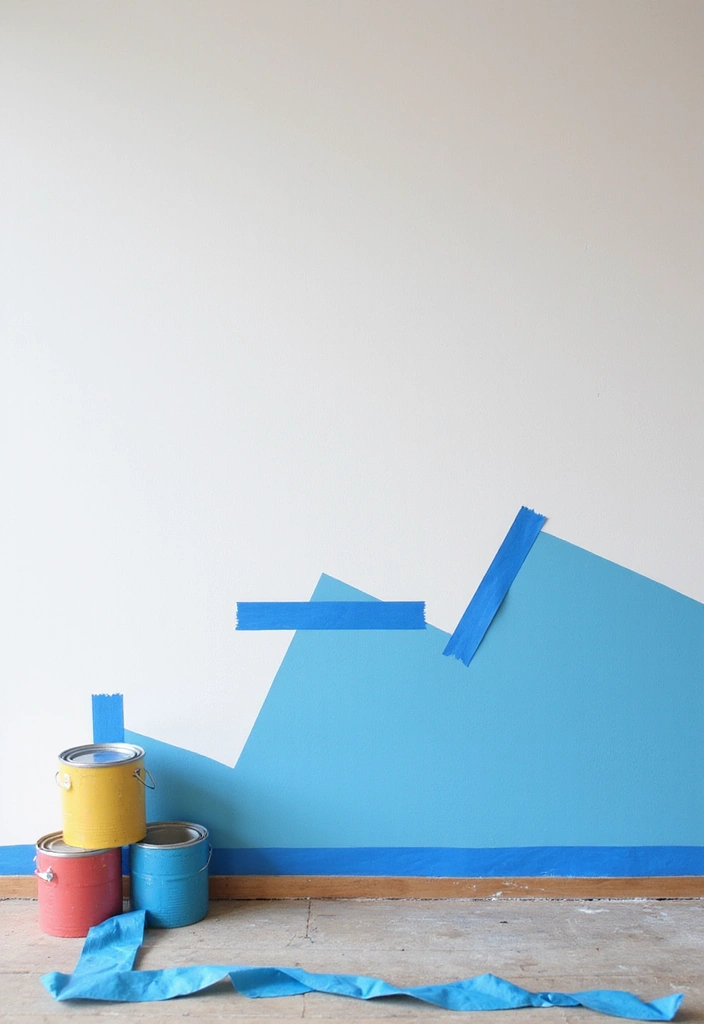
Transform your living space with stunning geometric wall art created with the help of painter’s tape. This approachable DIY project involves taping off sections of your wall and painting them in complementary colors, resulting in a bold and modern piece that adds depth and visual interest to any room.
For this project, you’ll need an acrylic paint set to choose the perfect colors that complement your decor. Use paint rollers for a smooth and even application, ensuring that your lines remain crisp and clean. Don’t forget to protect your floors with a reliable drop cloth, making cleanup a breeze.
This technique is an excellent way for beginners to dive into the world of painting, as the tape guarantees professional-looking results without the stress!
4. DIY Botanical Prints
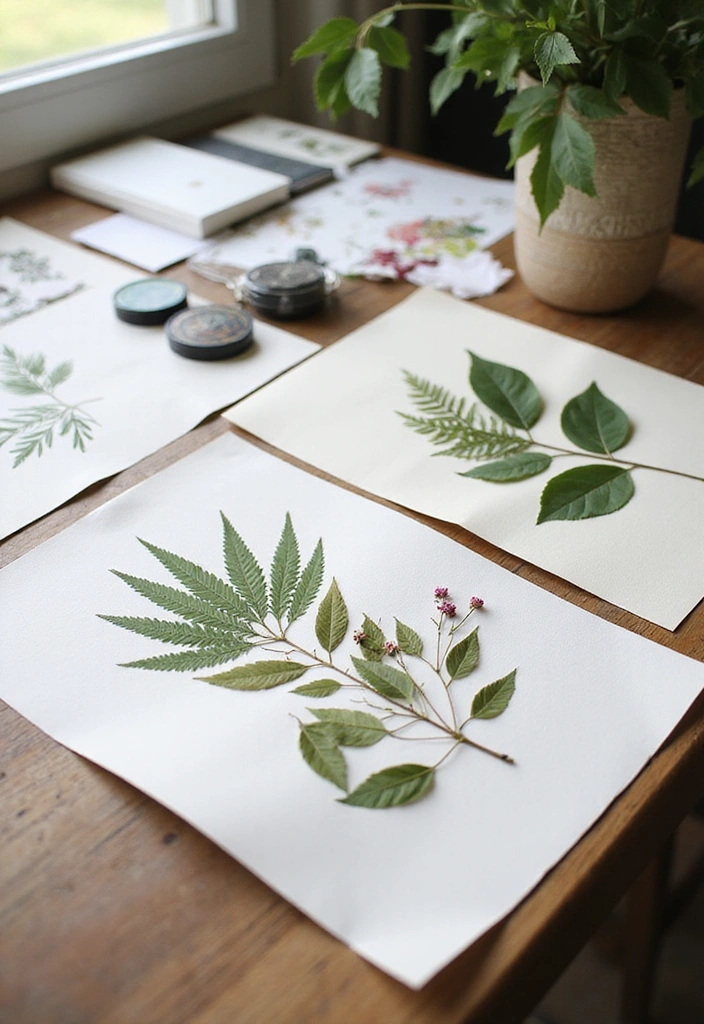
Embrace the beauty of nature by creating your own DIY botanical prints, a delightful way to capture the essence of greenery in your home.
Using real leaves and flowers, you can produce breathtaking prints by pressing them onto quality watercolor paper with vibrant ink or paint. For an added touch of convenience, consider utilizing a pressing flowers kit to ensure your botanical elements are perfectly preserved for printing.
Finish off your prints with colorful designs using ink pads, adding an artistic flair that harmonizes with the organic forms.
These elegant creations can be framed or incorporated into a larger collage, allowing you to bring the tranquility of the outdoors into your living space and cultivate a serene atmosphere.
5. Cork Board Art
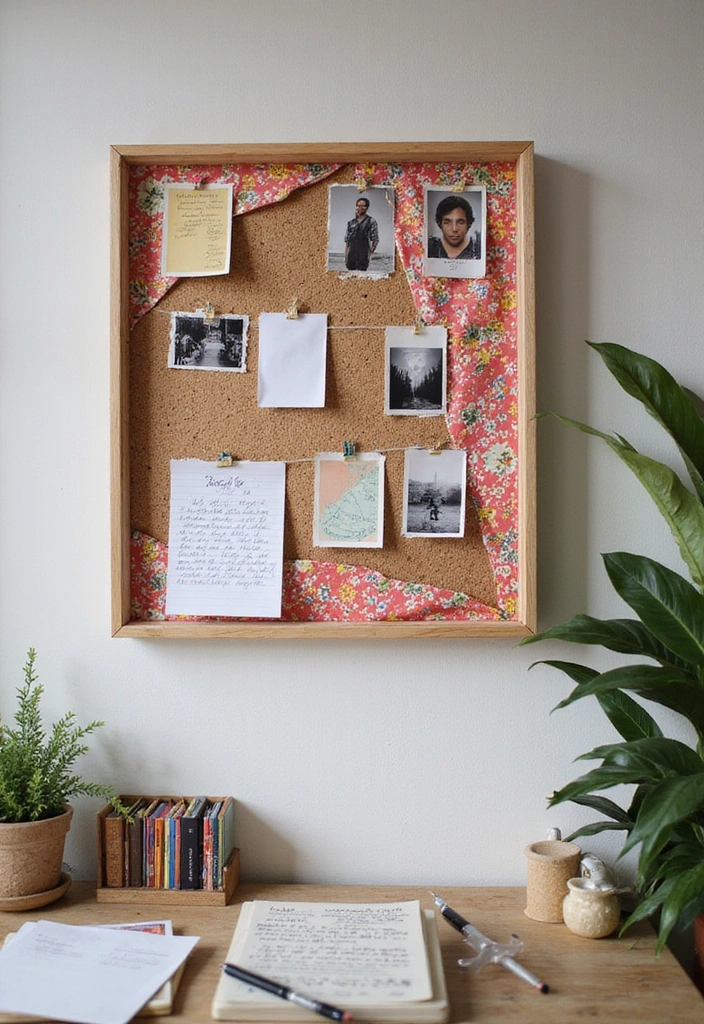
Transform an ordinary cork board into a vibrant canvas of creativity with some simple art techniques.
Start by covering the board with your choice of fabric, paint, or even cherished photos. For those looking to add a bit of flair, consider using fabric to give your board a unique texture and style.
Once you’ve chosen your base, you can paint patterns directly on the cork or turn it into a personalized mood board that inspires you daily. Don’t forget to grab some push pins to help you pin notes and reminders, adding both functionality and flair.
To make the application process easier, use spray adhesive for a smooth and secure finish.
This DIY project is perfect for any room, allowing you to add a personal touch while serving a practical purpose.
6. String Art Wall Hangings
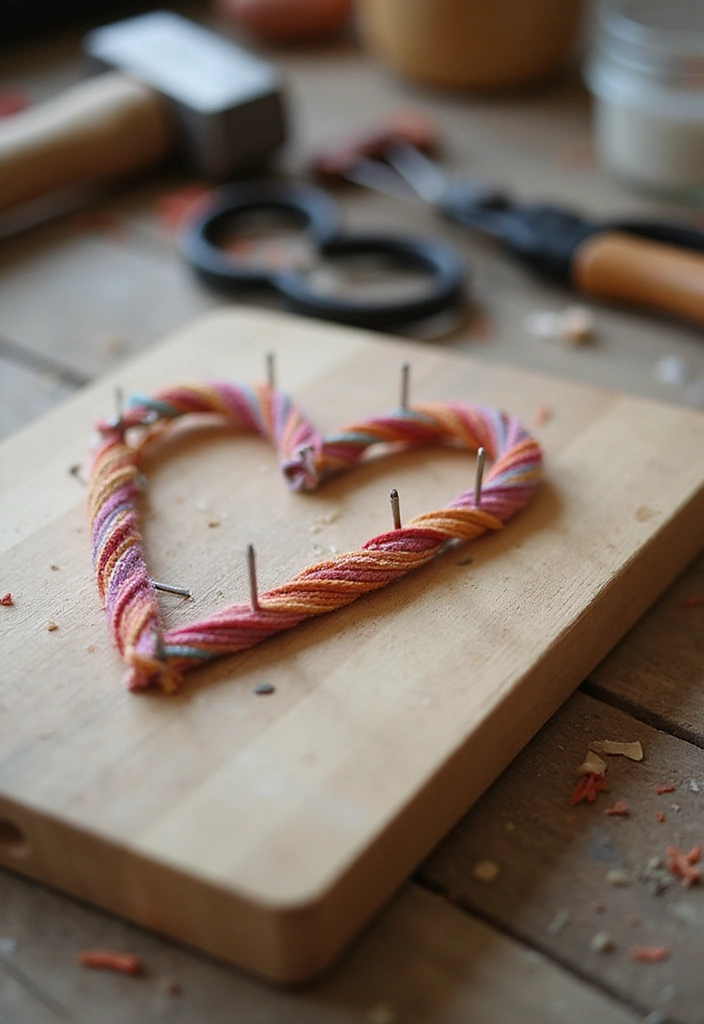
Create stunning string art that beautifully merges craftsmanship with artistic flair.
With just a simple wooden board, a reliable hammer, sturdy nails, and vibrant colorful string, you can craft intricate designs or even spell out meaningful words that resonate with you. This engaging project is not only enjoyable, but it’s also an excellent way to enhance your crafting skills.
Don’t forget to have a pair of scissors handy for cutting the string to your desired lengths.
Once your masterpiece is complete, your string art will become a unique focal point in any room, showcasing your creativity and hard work.
7. Watercolor Wall Art
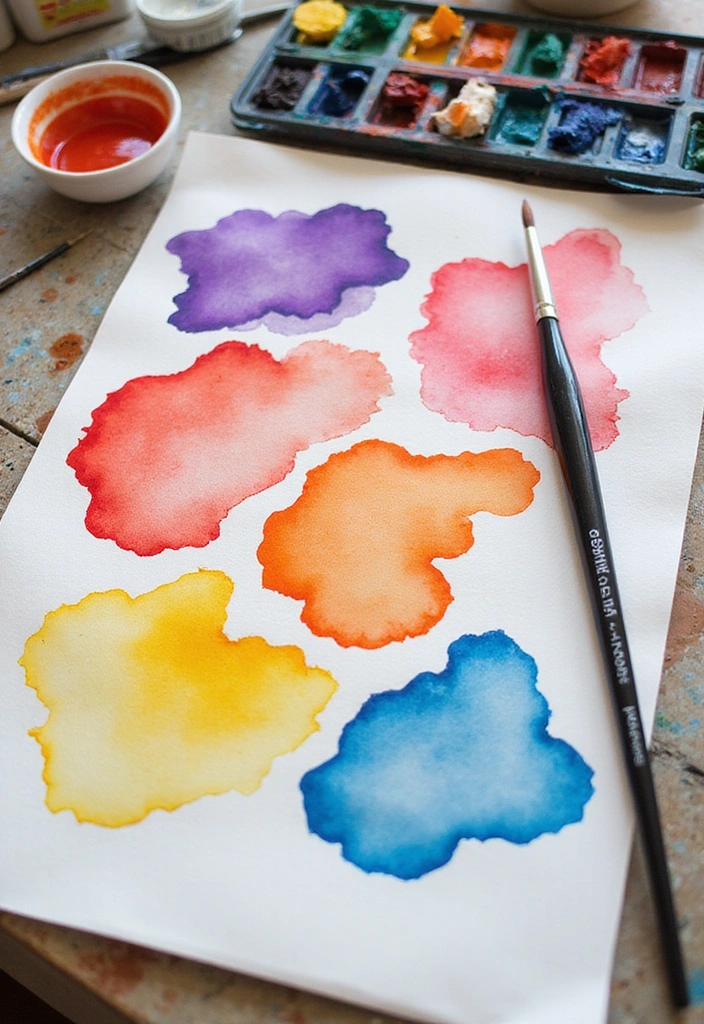
Transform your walls with vibrant watercolor art that adds a unique splash of color to your home. This DIY technique is perfect for beginners, allowing you to play with soft washes and bold strokes to craft stunning pieces.
To get started, you’ll need a quality watercolor paint set and a selection of watercolor brushes that can help you achieve various effects. Don’t forget to invest in some watercolor paper to ensure your colors pop and last.
For mixing and blending your paints, a reliable palette is essential. Once you finish your artwork, it can be framed for a polished look or hung directly on the wall for an eye-catching display. Happy painting!
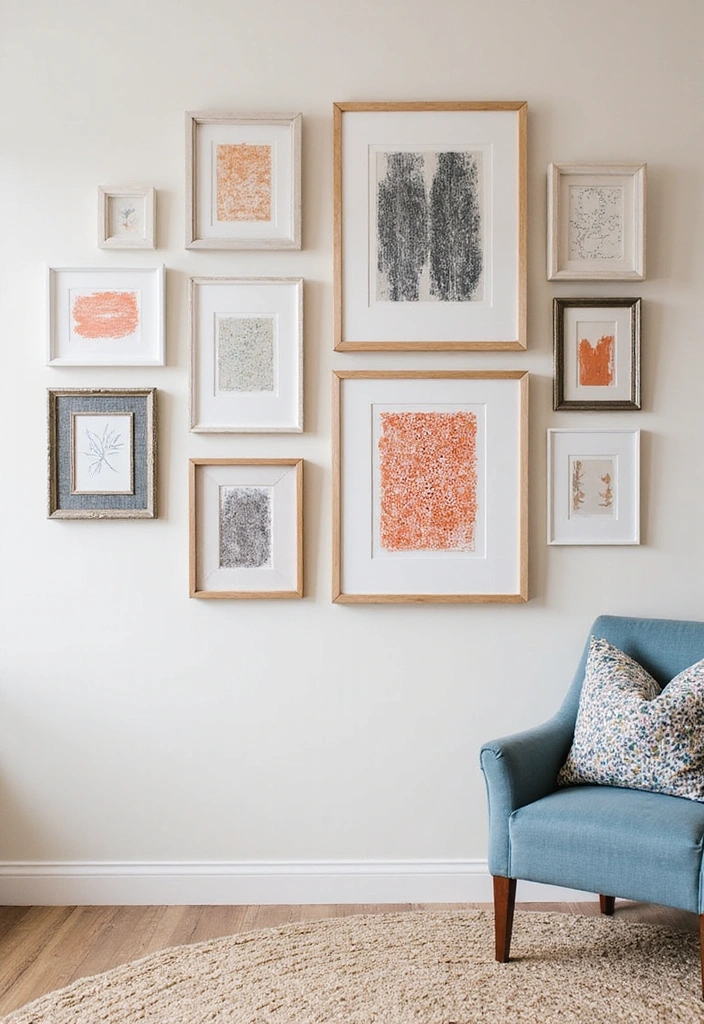
8. Photo Collage Wall Art
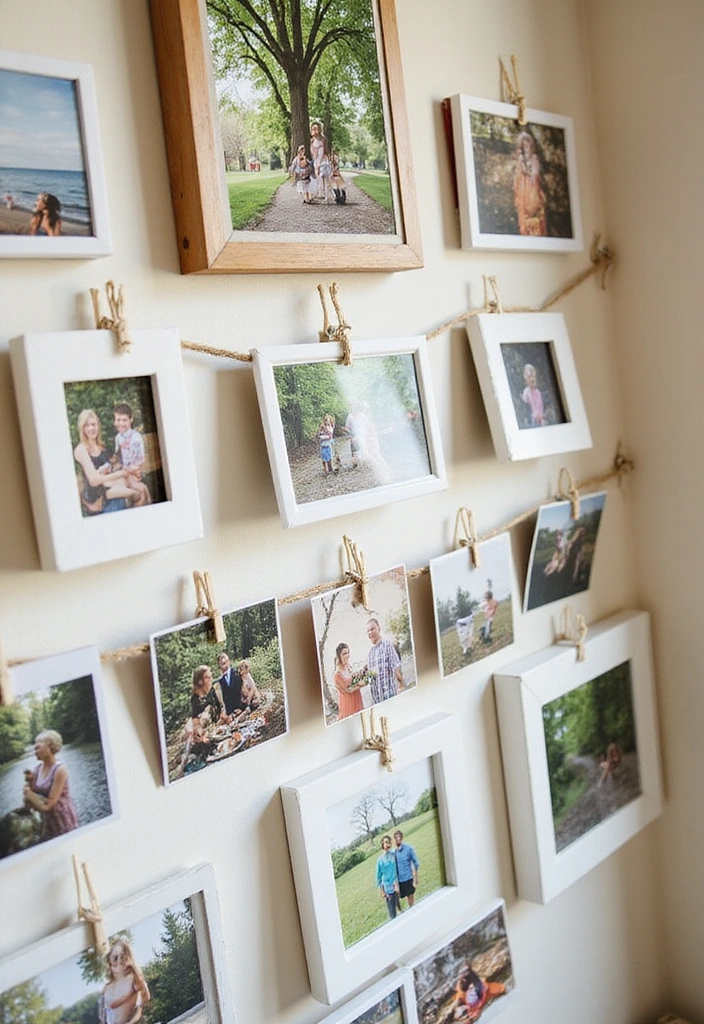
Transform your cherished memories into beautiful photo collage wall art that adds a personal touch to your space.
Begin by selecting your favorite photographs and arranging them in a creative manner that tells your unique story. You can enhance the display by using various photo frames to give each picture a distinct look, or opt for a charming and casual approach with clothespins and a simple string to hang your photos.
For added ambiance, consider incorporating string lights that will illuminate your collage and create a warm atmosphere. If you need to print out your images, a reliable photo printer can help you achieve high-quality prints right at home.
This personalized decor not only beautifies your space but also brings you joy every time you glance at it.
9. Canvas Quote Art
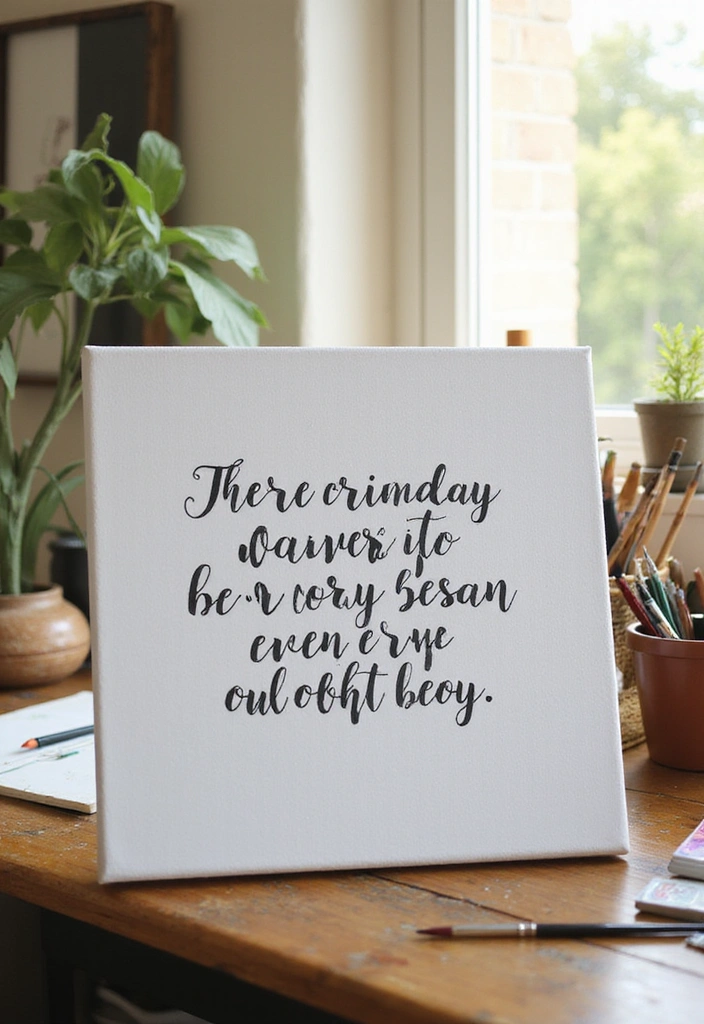
Infuse your walls with motivation by creating stunning canvas quote art.
Select your favorite inspirational quotes and transfer them onto canvas boards using either paint or stencils. This project allows for endless personalization, as you can choose different acrylic paint colors and styles to complement your home decor.
For precise lettering, consider using paint pens or stencils to enhance your designs.
Hang your finished canvas in a space that motivates you, whether it’s your workspace, bedroom, or living area, transforming your surroundings into a daily source of positivity.
10. Upcycled Wooden Pallet Art

Breathe new life into old wooden pallets by transforming them into stunning rustic wall art that will enhance any space in your home.
You can choose to paint them using vibrant colors with quality paint, apply creative designs with stencils, or leave them in their natural state for that charming farmhouse aesthetic.
To ensure a smooth finish, don’t forget to use some sandpaper beforehand.
This project not only saves you money but also adds a unique, eco-friendly touch to your home decor. Once completed, your pallet art can be displayed in your garden, on your porch, or indoors as a captivating conversation starter. For those who want to take their crafting to the next level, be sure to have the right brushes handy to achieve the best results. Start your DIY journey today with these essential supplies, including quality wooden pallets!
11. Mosaic Tile Art
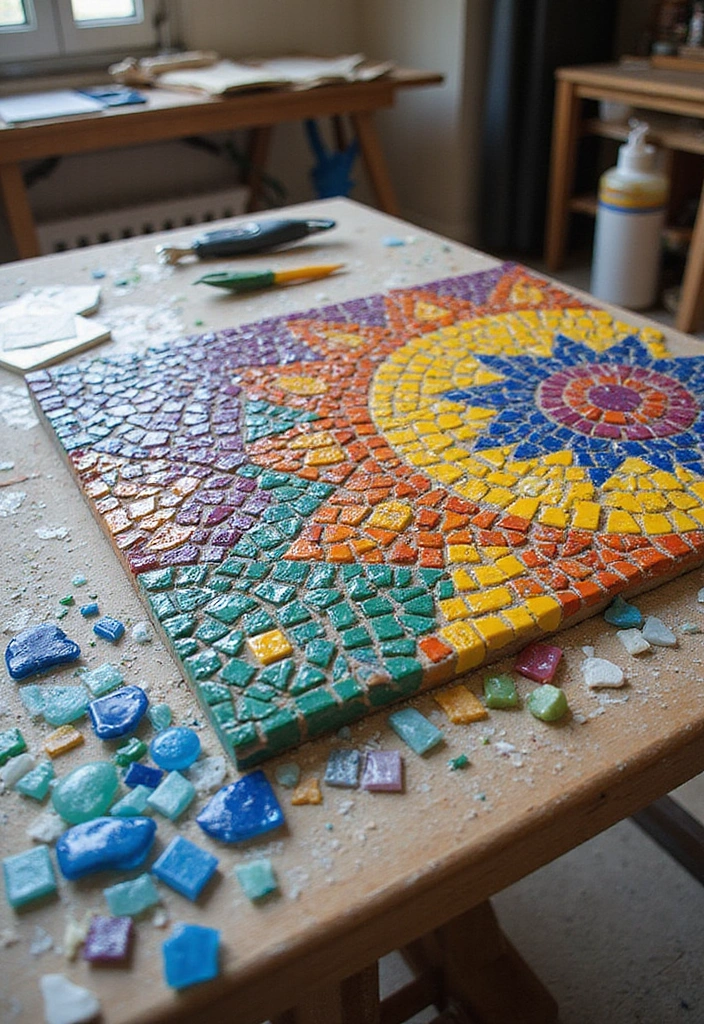
Transform your walls with eye-catching mosaic tile art that brings vibrant color and texture into your space.
By utilizing broken tiles, colorful glass, or even patterned paper, you can craft a design that truly showcases your unique personality. Whether you prefer a simple layout or a more complex pattern, this project accommodates all skill levels, making it a fun and rewarding experience for everyone.
To get started, you might want to consider investing in some quality mosaic tiles for your artwork. A reliable tile cutter will help you shape your materials with precision, while grout provides the finishing touch to hold your design together. Don’t forget to grab some adhesive to secure your tiles in place and always wear safety goggles for protection while working.
Once your masterpiece is complete, you can proudly display your mosaic as a one-of-a-kind piece of art!
12. Painted Rock Art
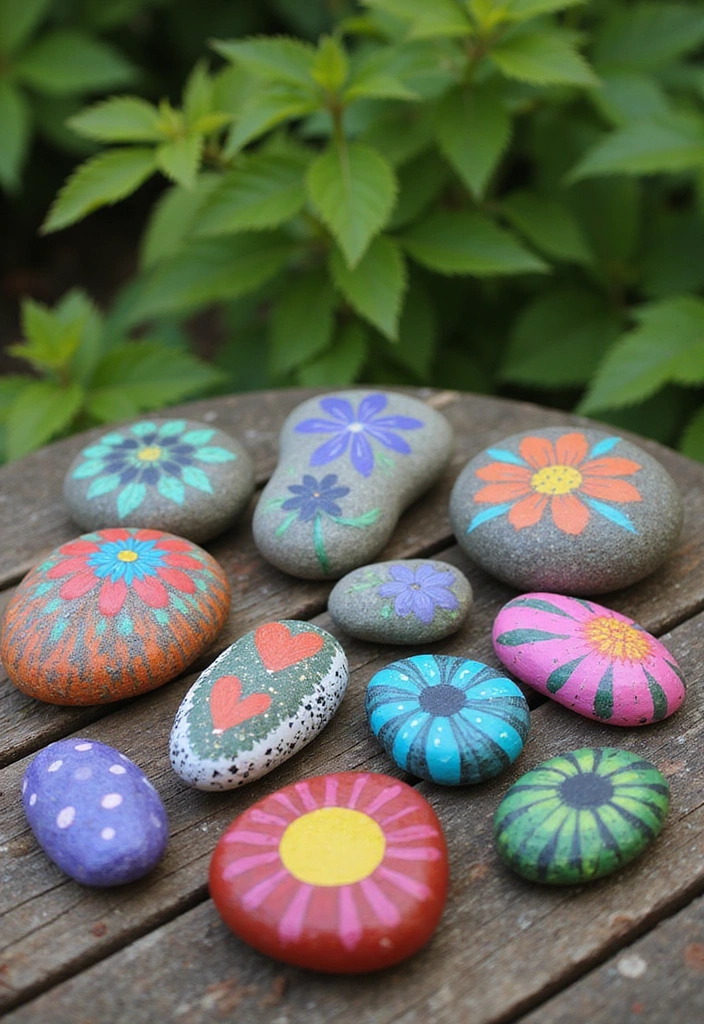
Unleash your inner artist with the delightful craft of painted rock art, perfect for both indoor and outdoor display.
Start by gathering some smooth river rocks, which you can find here. Once you have your rocks, let your creativity flow by painting them with vibrant acrylic paints available here.
Don’t forget to grab a set of paintbrushes to help achieve those intricate designs; you can find a great selection here.
After your masterpieces are complete, protect them with a sealant spray, which is essential for ensuring their longevity. You can purchase a reliable sealant here.
These unique pieces can add a personal touch to your decor, whether displayed in a garden, on a shelf, or as part of a stunning centerpiece collection.
13. Shadow Box Art
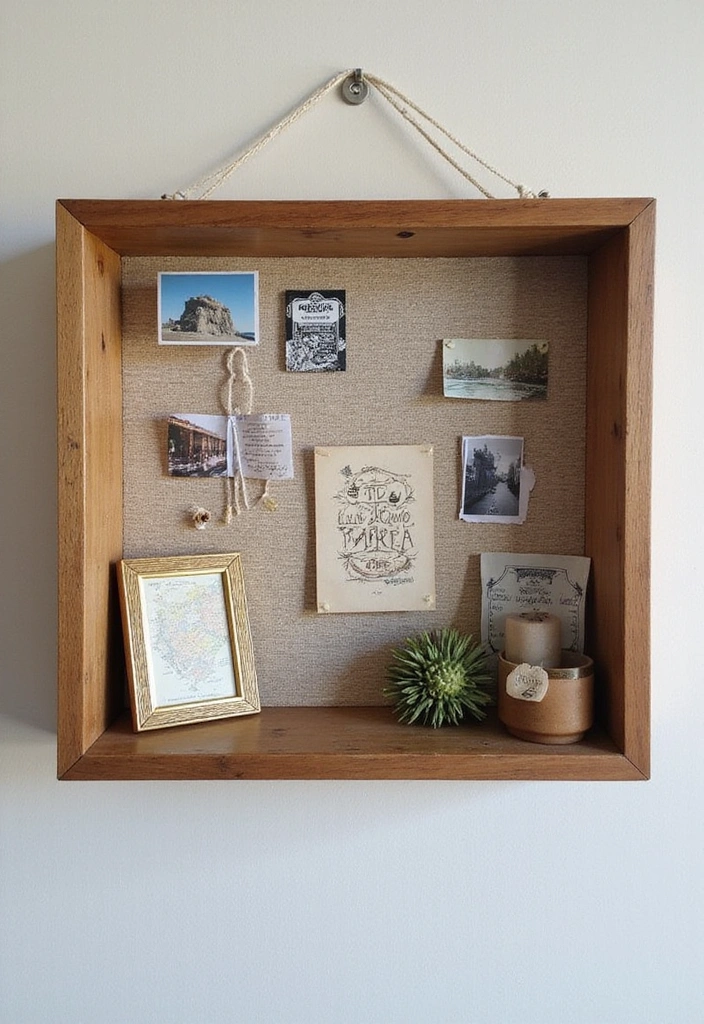
Elevate your home decor with captivating shadow box art that merges 3D elements and personal memorabilia, creating depth and intrigue in any space.
Start by choosing a shadow box frame that complements your style. This frame will serve as the foundation for showcasing cherished items like concert tickets, photographs, or travel souvenirs.
To enhance your creation, consider using decorative paper for the background, adding color and texture that reflects your personality. Secure your items in place with crafting glue, ensuring they’re beautifully displayed. Don’t forget a good pair of scissors for precise cutting and trimming.
This unique art form not only tells a story but also adds a personal touch to your decor, making it a perfect addition to any room!
14. Hand-Painted Plant Pots
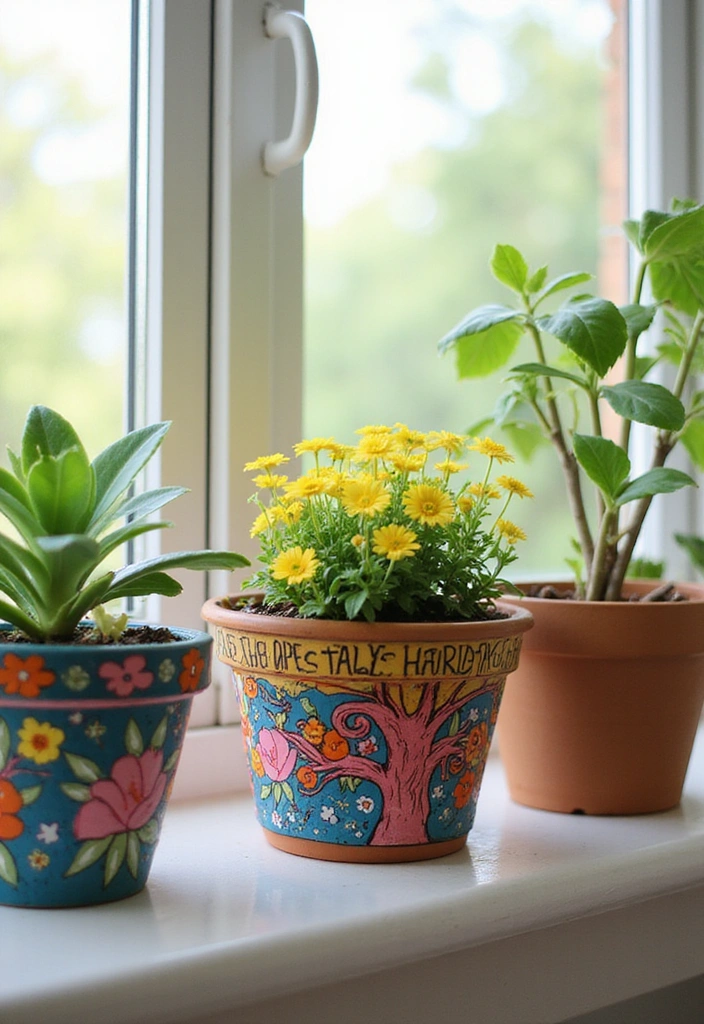
Transform your home with hand-painted plant pots that blend greenery and creativity!
Start with terracotta pots or ceramic options, and unleash your artistic flair using acrylic paints.
With a few paintbrushes in hand, you can create unique designs that reflect your personal style.
To complete your project, don’t forget to add plant soil and choose from a variety of beautiful indoor plants to fill your pots.
Arrange your colorful creations together for a vibrant display or scatter them throughout your home to add charm and character!
15. Clay Wall Art
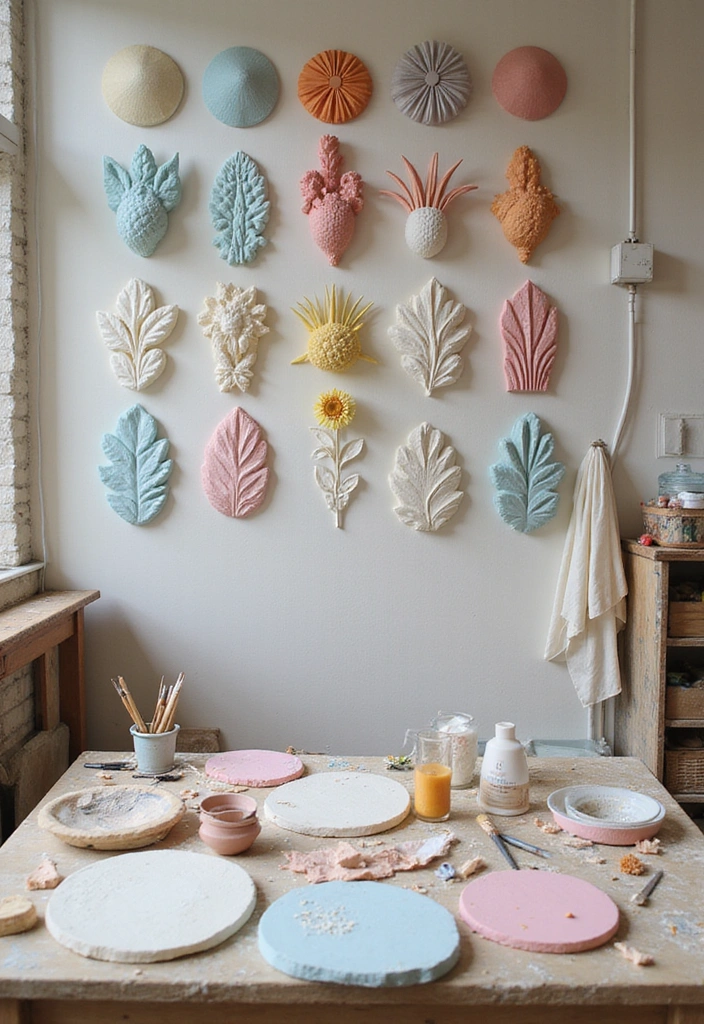
Unleash your creativity with clay wall art that introduces a tactile element to your decor. Using air-dry clay, you can sculpt stunning designs, shapes, or even personalized words that reflect your unique style.
To bring your creations to life, consider utilizing sculpting tools for more intricate detailing, and once your pieces are ready, paint them with vibrant colors using acrylic paint.
Don’t forget to equip yourself with high-quality paintbrushes to achieve that perfect finish. After your masterpieces are complete, you can easily mount them on your wall using reliable mounting hardware or display them on a shelf. Clay art is a fantastic way to delve into three-dimensional design while creating unique, personalized decor that speaks to your individuality.
16. Digital Print Art
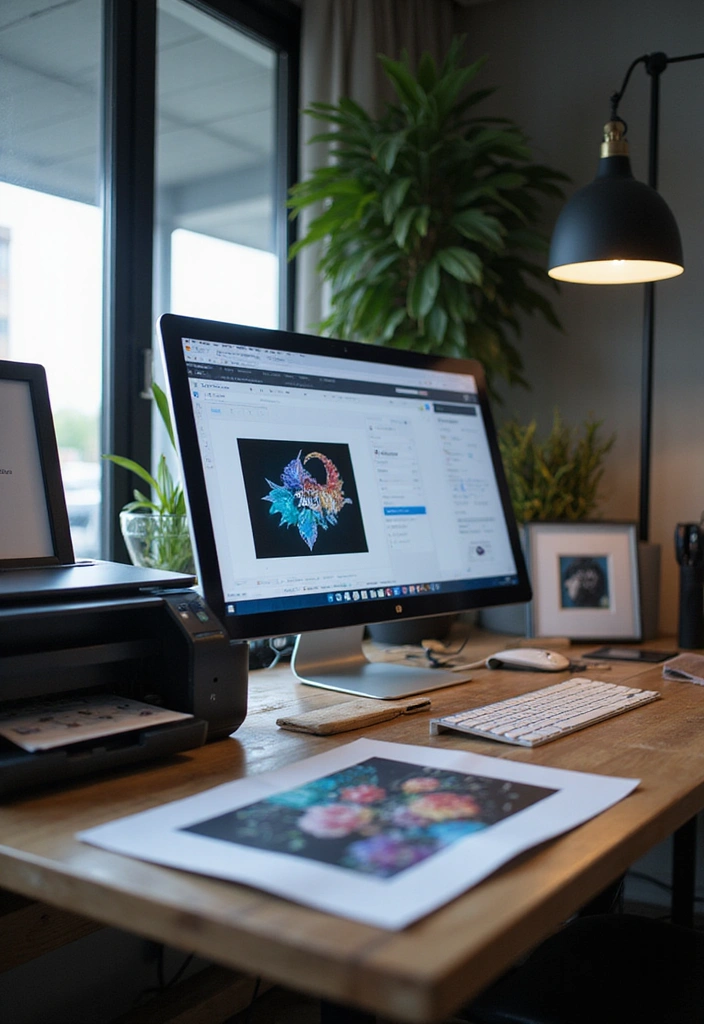
Embrace the digital age with customizable digital print art that you can easily create and print. Start by using design software, such as this great option, to craft unique quotes or graphics that reflect your personal style.
For those who enjoy drawing, a digital drawing tablet like this one can help you create stunning artwork with precision and ease. Once your design is ready, print it using a high-quality printer, such as this model, to ensure vibrant colors and sharp details.
Don’t forget to stock up on quality paper; you can find excellent options like this paper that will enhance the final look of your art. This method allows you to easily change your decor and keep it fresh, adapting to seasonal trends or personal taste, all without a significant investment.
17. Yarn Wall Hangings
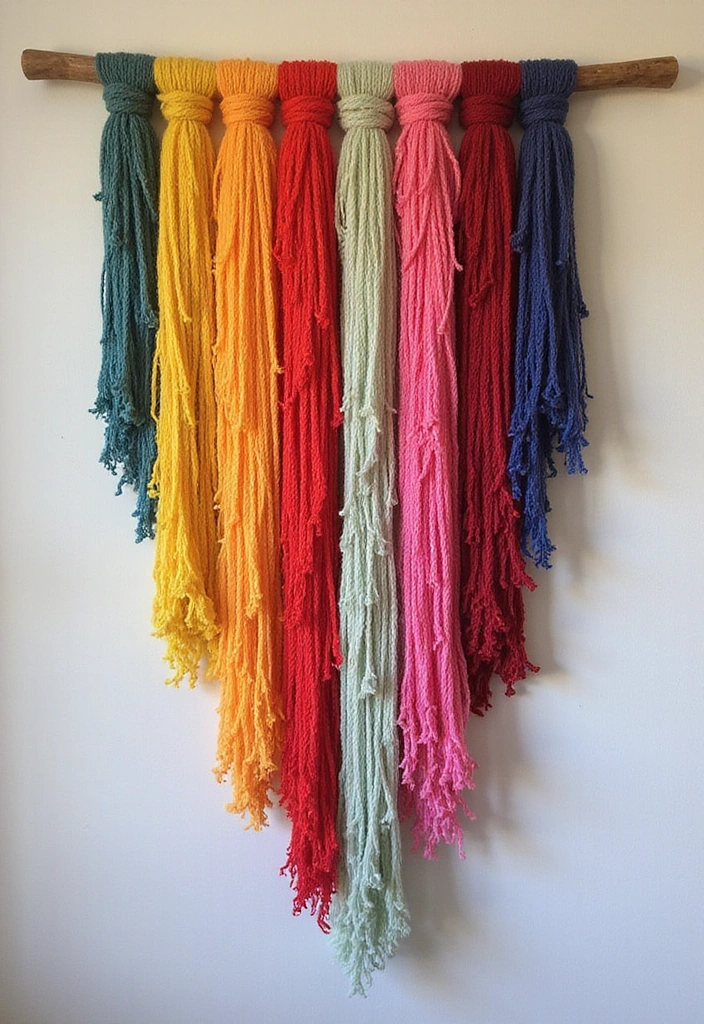
Add a touch of warmth and texture to your walls with stunning yarn wall hangings that are perfect for any space.
By using a variety of yarns, you can explore different colors and textures to weave or knot intricate patterns that create a captivating visual impact. For your project, consider picking up a variety of yarns to ensure you have plenty of options to express your creativity.
You’ll also need some sturdy wooden dowels to serve as the foundation for your artwork, allowing you to hang your masterpiece with ease. Don’t forget a good pair of scissors for cutting your yarn, and a reliable glue to secure any embellishments or knots.
This technique is not only therapeutic but also provides endless opportunities for personalization. Hang your yarn art in a cozy corner or above your bed to create a stunning focal point that draws the eye and enhances your living space.
18. Canvas Splatter Art
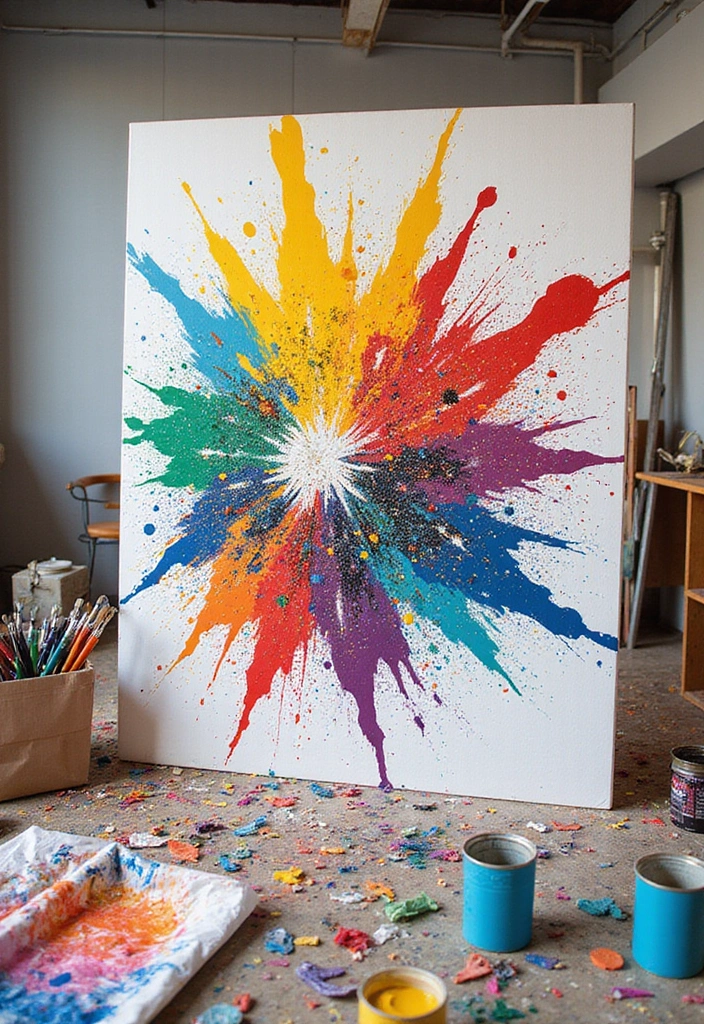
Unleash your inner artist with the exciting technique of canvas splatter art, which brings a lively energy to your home decor.
By using canvas boards and an array of vibrant acrylic paints, you can create an abstract masterpiece that exudes creativity and spontaneity.
This fun and carefree approach allows you to splatter paint freely, so there’s no need to stress over precision.
Don’t forget to protect your workspace with a drop cloth and use paint brushes for added control.
Once your artwork is dry, it will serve as a stunning focal point that energizes any room!
19. Dried Flower Art
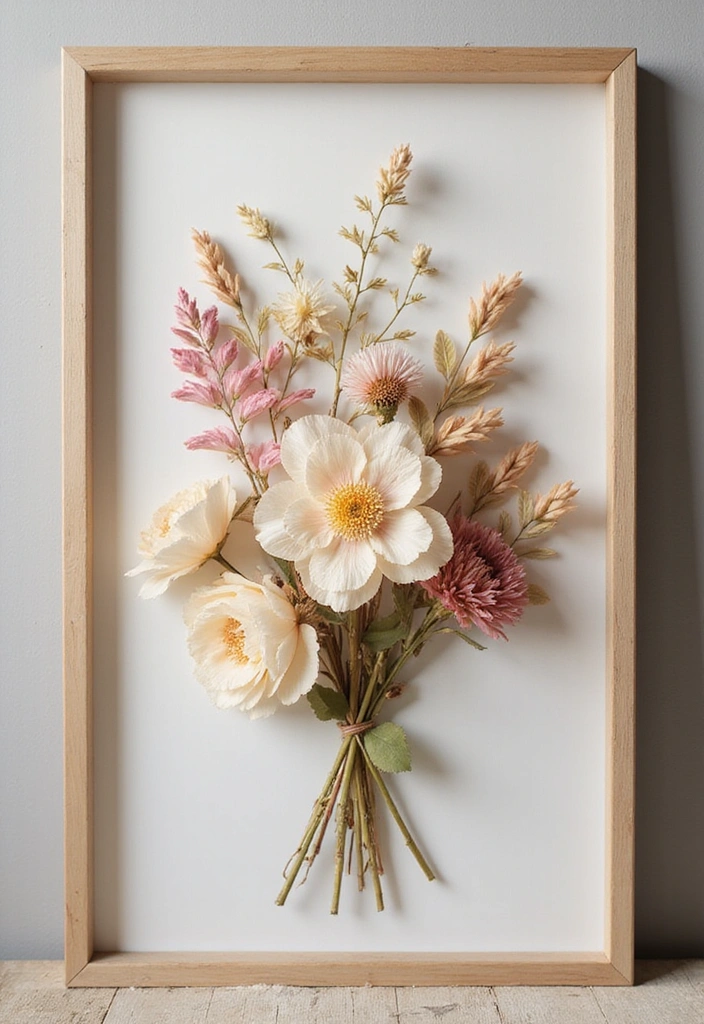
Capture the exquisite beauty of nature with dried flower art, a creative endeavor that brings a delicate touch to your living space.
Start by selecting your favorite flowers and drying them with a drying kit, which helps maintain their vibrant colors and shapes. Once your flowers are ready, arrange them in a beautiful picture frame or on a canvas to create a stunning piece of art that is sure to draw attention.
For precise cutting and arranging, a good pair of scissors will make the process easier and more enjoyable.
This timeless art form not only looks breathtaking but also allows you to preserve the beauty of nature in your home. Dried flower art can transform your walls and be used as stunning centerpieces, evoking a sense of tranquility in any space.
20. Fabric Wall Hangings
Transform your space into a cozy retreat with beautiful fabric wall hangings that add a touch of softness to your decor. By using a variety of fabrics, you can design a stunning tapestry or wall quilt that reflects your personal style.
For this beginner-friendly project, you’ll need high-quality fabric, which you can find in a wide selection here. A reliable sewing machine will make the process seamless, and you can choose one that suits your needs here. Don’t forget a good pair of scissors for those precise cuts, available here.
Once you’ve crafted your fabric art, hang it using a sturdy hanging rod, which you can find here. Whether placed in a bedroom or living room, your handmade fabric wall hangings will create a warm and inviting atmosphere that showcases your creativity.
21. Personalized Name Art

Celebrate your unique identity with personalized name art that brings a special flair to your decor.
By using wood letters, you can create a stunning display of your name or initials on a variety of surfaces such as wood, canvas, or paper. This DIY project is fantastic for children’s rooms, home offices, or any space that reflects your personality and style.
To enhance your art, consider using vibrant paint to customize the colors, while adhesive will help secure your letters in place. If you prefer a canvas look, grab some high-quality canvas to create a beautiful backdrop.
Don’t forget to equip yourself with essential crafting tools to make the process seamless and enjoyable. With a variety of fonts and colors at your disposal, you can easily tailor your name art to perfectly match your personal style!
Conclusion
With these 22 DIY wall art tutorials, transforming your living space has never been more accessible or enjoyable.
Each project invites you to explore your creativity, personalize your decor, and add character to your home.
So gather your materials, unleash your artistic side, and start creating pieces that reflect who you are!
Note: We aim to provide accurate product links, but some may occasionally expire or become unavailable. If this happens, please search directly on Amazon for the product or a suitable alternative.
This post contains Amazon affiliate links, meaning I may earn a small commission if you purchase through my links, at no extra cost to you.